In this guide, we’ll show you how to create a new pair of SSH keys using the ssh-keygen tool on your Windows, MacOS or Linux machine. We will also show you how to use the keys to configure and setup SSH public key based authentication for a linux server.
Finally, we will also show you how to manage SSH key creation, distribution and key rotation at scale using BastionXP SSH Key Management Software.
Step #1 Create the SSH keys
When you install OpenSSH in your Windows, MacOS, or Linux machine, it comes with a set of handy tools. One of them is ssh-keygen.
We’ll use ssh-keygen to create an SSH public-private key pair.
$ ssh-keygen -t rsa -b 4096
Generating public/private rsa key pair.
Enter file in which to save the key (/home/bob/.ssh/id_rsa):
Enter passphrase (empty for no passphrase):
Enter same passphrase again:
Your identification has been saved in /home/bob/.ssh/id_rsa
Your public key has been saved in /home/bob/.ssh/id_rsa.pub
The key fingerprint is:
SHA256:ShpCF11/fYjujAVDYivNKpNM6QdVwh8Z9sX00PIspdo
bob@localhost
The key's randomart image is:
+---[RSA 4096]----+
|    .oooBo.o+.   |
|     +o*o* .o=o. |
|  . = ..+.= o*+ .|
| . = o o.  =o o. |
|  . B + S  oo.   |
|   . B .  .=E    |
|    . .   . o    |
|                 |
|                 |
+----[SHA256]-----+
We are requesting a RSA type key and the key length should be 4096 bits. The longer the key, the harder it is to crack it.
There are other SSH key types such as dsa, ecdsa etc., that can be generated using the ssh-keygen command as shown in the following example below:
$ ssh-keygen --help
...

ssh-keygen -t [dsa | ecdsa | ecdsa-sk | ed25519 | ed25519-sk | rsa]

...
It is highly recommended to provide a passphrase for the private key, when prompted. If an unauthorized user gets hold of the private key with no passphrase, they will be able to log in to any server you’ve configured with the associated public key.
The above command would have generated an SSH pair - public key and a private key, in the default .ssh folder in your home directory. For example: /home/bob/.ssh/
Public Key: /home/bob/.ssh/id_rsa.pub
Private Key: /home/bob/.ssh/id_rsa
You should neither share the private key with anyone nor copy it to your online storage or emails or chat window.
You must always generate SSH private key and public key locally using highly secure and trusted SSH key generation tools such as ssh-keygen or bastionxp. You should only copy over the SSH public key from your local machine to the server over the internet. You should never move around or copy your private key to anywhere.
Moreover, for better security, never use the same SSH key pair to login to multiple servers. Generate and use a new pair of SSH keys to access each server. This security best practise will reduce the surface area of attack, incase someone happens to know about your private key.
Step 2: Configure the server to use the public key
Next, we need to securely copy the SSH public key to the server. We’ll use a tool named ssh-copy-id that is part of the ssh toolkit.
$ ssh-copy-id bob@server-name
Once the above command completes, you can login to your server using the SSH public key. If you have set up a passphrase during the key generation, the ssh-copy-id command will ask for it.
Alternatively, you can copy the SSH public key manually to the server. You need to copy-paste or append the public key to the ~/.ssh/authorized_keys file on the server.
$ cat /home/bob/.ssh/authorized_keys
#Bob's key
ssh-rsa AAAAB3NzaC1yc2EAAAADAQAB... bob
Step 3 Verify SSH login using the key
Verify if you can login to the server using the ssh key generated above. Run the SSH client command as shown below:
ssh -i /home/bob/.ssh/id_rsa bob@server-name
The -i option is used to specify the identity file or the SSH private key file. You may be prompted for the passphrase to unlock the private key, if you provided one during the step #1 above.
When you login using the SSH key for the first time, you’ll see a weird message on the console, something like this:
The authenticity of host 'server-name (10.1.1.1)' can't be established.
ED25519 key fingerprint is SHA256:LKVs+g5kgmIXsYkU2Fl8XmNOmW4Rz1/AoXBLdRoanzM.
This key is not known by any other names
Are you sure you want to continue connecting (yes/no/[fingerprint])?
This is a catch22 situation where you can neither deny nor agree with the message. If you know this is your host or server, then say yes and continue. The SSH public key of the host will be stored in the ~/.ssh/known_hosts file in your client machine for future reference. Next time when you SSH login, you’ll not see the message again.
If you prefer not to input the SSH key file location and the username everytime you use the ssh command, you could setup the SSH config in your user machine as shown below:
$ cat ~/.ssh/config

Host host1
   HostName host1.example.com
   User bob
   IdentityFile ~/.ssh/id_rsa
Description of the fields used in the above config file:
- Host — the nickname for the host.
- HostName — the IP address or domain of the remote server.
- User — the username associated with the account in the server.
- IdentityFile — the location of your SSH key to be used for login to this host.
If you prefer to use a different private key for each host, then you could setup your config file as shown below:
$ cat ~/.ssh/config

Host host1
   HostName host1.example.com
   User bob
   IdentityFile ~/.ssh/id_rsa_host1

Host host2
   HostName host2.example.com
   User bob
   IdentityFile ~/.ssh/id_rsa_host2

Host host3
   HostName host3.example.com
   User bob
   IdentityFile ~/.ssh/id_rsa_host3
Here after you could SSH into any host with a simple command like:
$ ssh [host-nickname]
For example, to login to host1:
$ ssh host1
Step 4: Disable password based authentication, if required.
Now that you have set up your SSH keys for login, it is the right time to completely disable password based login in your SSH server.
Note: Make sure that all other users of the server also have setup SSH public key based login successfully, before you turn-off the password based SSH login. Because once you disable password based authentication, any user still using password for SSH login wouldn’t be able to do so after this.
Edit the /etc/ssh/sshd_config file in the server using any editor of your choice, say nano or vim. Change the setting named PasswordAuthentication: to no as shown below.
$ nano /etc/ssh/sshd_config
…
PasswordAuthentication: no
…
If you see any ‘#’ at the beginning of the line, make sure you delete it. # is used to comment out a configuration. You need to uncomment it to make the configuration effective. Save the change and restart the SSH server daemon using the following command as sudo user:
$ sudo systemctl restart sshd
Verify sshd server is up and running.
$ sudo systemctl status sshd
Problems at Scale:
You have just created an SSH key pair using the ssh-keygen tool and setup one user for SSH public key based authentication. Now, you as an admin of your organization, should repeat the same procedure to create new ssh key pair using the ssh-kegen tool and set up SSH public key based authentication for the remaining users.
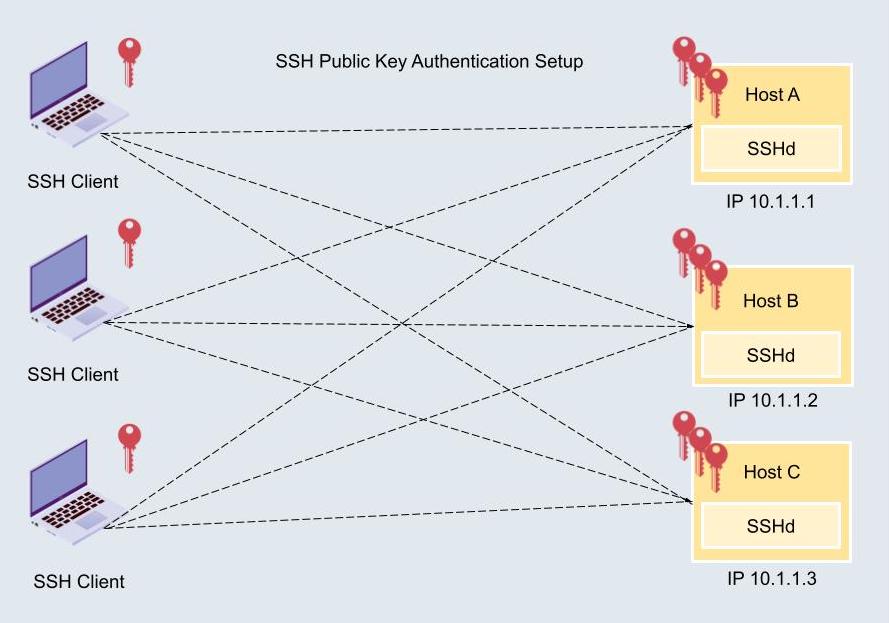
If you have more than one server in your organization(which would most likely be the case), then you need to copy each user’s SSH public key to the authorized_keys file in all the servers. This becomes a M * N problem set.
It is not possible to do this task manually with a scaled infrastructure. Some sort of a software or automation tool is required to complete the task.
It is highly recommended that a user doesn’t reuse the same SSH public key to login to all SSH servers. If an unwanted user were to get hold of the private key, the potential attack surface becomes large.
There are some additional problems & operational challenges associated with using SSH public key based authentication. We discuss this in detail in our next article here:
Solution to the scalability problem
BastionXP provides a centralized SSH Key Management Solution that automates SSH key creation, distribution and deletion at scale for all Linux servers and users in your organization. BastionXP supports Windows, MacOS, and Linux running on any hardware platform.
BastionXP creates a unique, short-lived single-use SSH public keys for each user to login to each server.
SSH key pairs are always generated locally on your access machine such as your laptop where your SSH client runs. Only the public key will be copied over to the server using an encrypted communication channel. The private key will always remain in your access machine and never be copied over to another machine or server.
The short-lived SSH public key will be deleted immediately after the user logins.
If the user wants to re-login to the server, a new SSH key pair will be generated and placed in the appropriate location in the Linux server.
This is to avoid perpetual key storage in the servers and to avoid the key sprawl problem.
Try BastionXP SSH Key Management Solution for absolutely free for 30-days.